
Baby Steps and Spinning Out
It’s weird isn’t it, how you can not do something for a long time and when you go back to it, you remember bits- not everything but bits. I talked a bit about my anxiety issues and meds in my previous post, and so to have a slightly befudded brain that is trying to recall past information can be frustrating and mentally draining to say the least. As much as it is so important to look after yourself (and not just ‘when you need it’, but all the time) it’s also important to push yourself somewhat. Challenge yourself. With my med reduction, better coping skills and camera bag, off I went in the glorious sunshine to feed my soul with my own creativity.
Have I ever mentioned that I live in the most beautiful city in the world? No?! 🙂

Available to licence via the EyeEm Market https://www.eyeem.com/p/110765343
I headed down to the harbourside- all the way putting more and more pressure on myself to try and remember all the bits I’d learned. Focal length, aperture, ISO, various rules and tips, how does this damn camera work, all spinning round in my head making me feel useless.
Ah, thought challenging… I got this I thought, and began rationalising the BS that my brain was spewing.
In the end I rationalised with myself that:
a) there is no pressure except what I put upon myself,
b) it doesn’t matter that I can’t remember it all right now- I don’t have to and nobody is expecting me to,
c) it’s the first time I’ve been out (both out and with camera) in ages,
d) it’s a beautiful, peaceful day to be enjoyed even if I don’t take a single image,
e) the camera has an auto-mode- watch which settings it’s suggesting and just focus on composition, and
f) you don’t need to be perfect.
Boom! Take that brain! I realise that it actually doesn’t seem like a big deal to a lot of people, but for me, I managed to pull myself back from an irrational thought pattern. Baby steps, eh? They’re still steps.
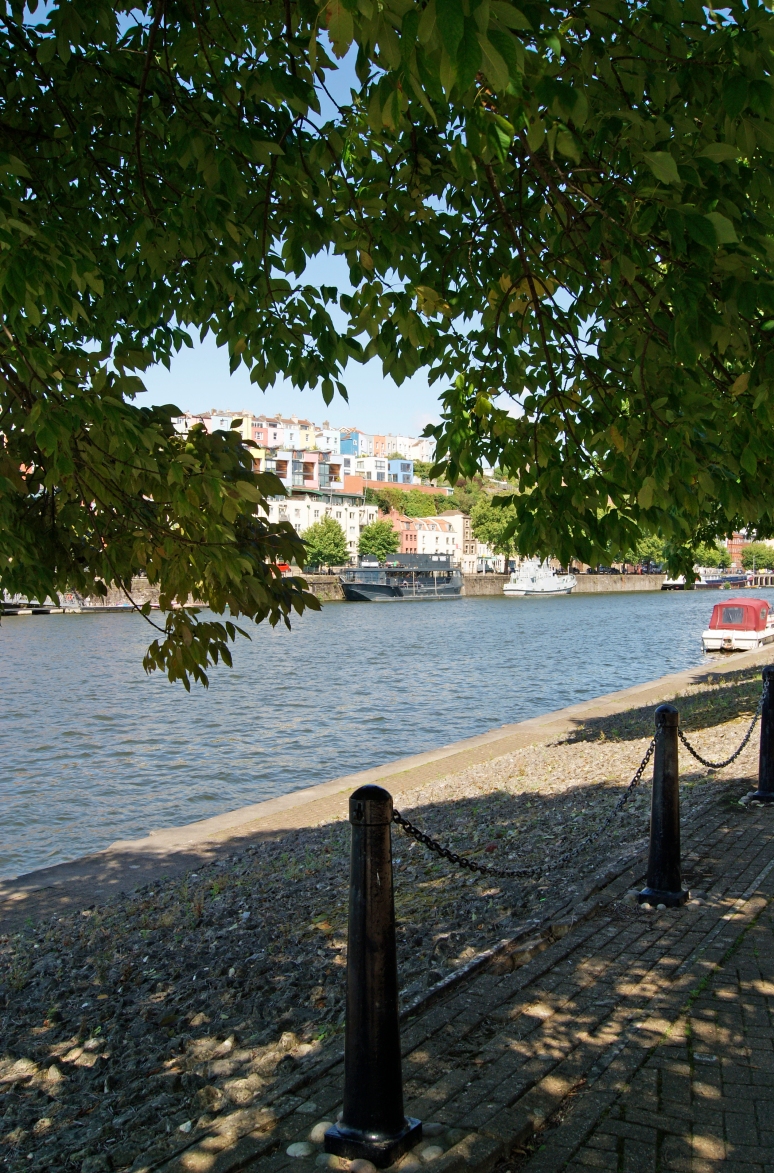
I thought I’d make my way round the M-Shed and along the waterfront to Baltic Warf, Spike Island. Using my Sony DSLR with the ever useful 18-50mm lens, and the dial on (whispers) auto I took some shots.
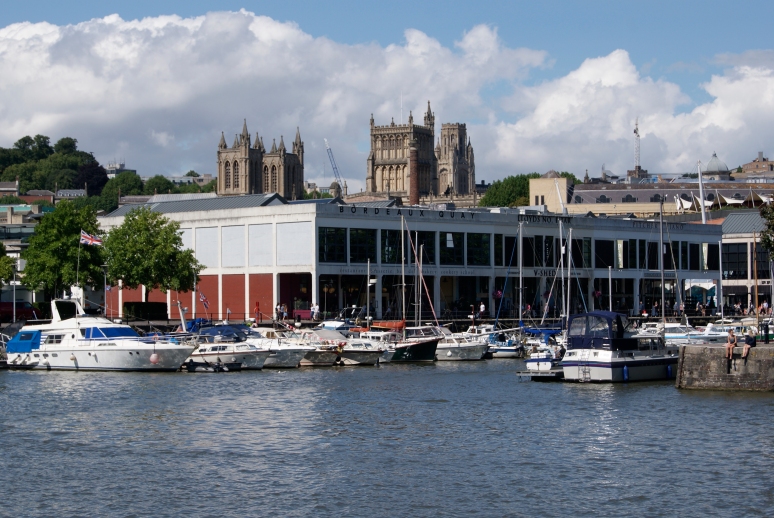
Bristol Waterfront. Image exclusive to mikesadventuresinpictures
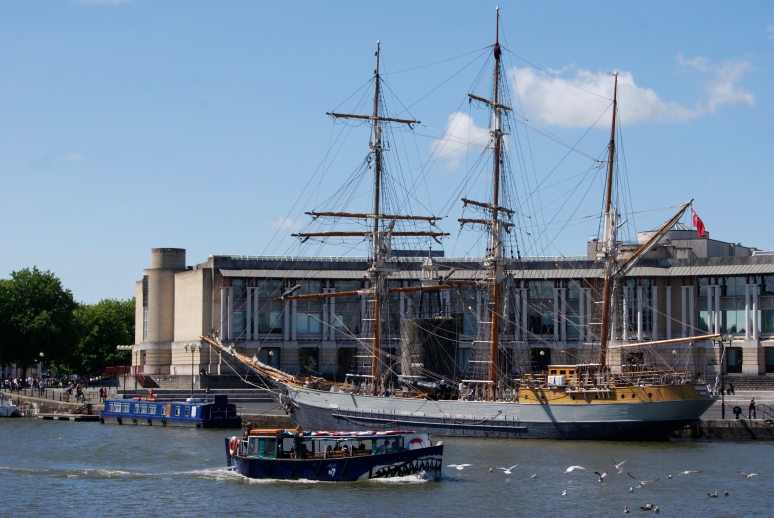
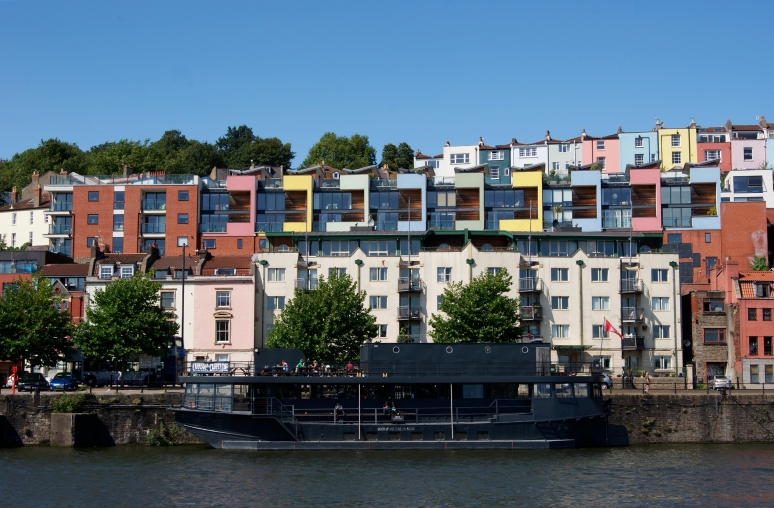
The Bird Eating Boat. Available to licence through the EyeEm Market: https://www.eyeem.com/p/110533192
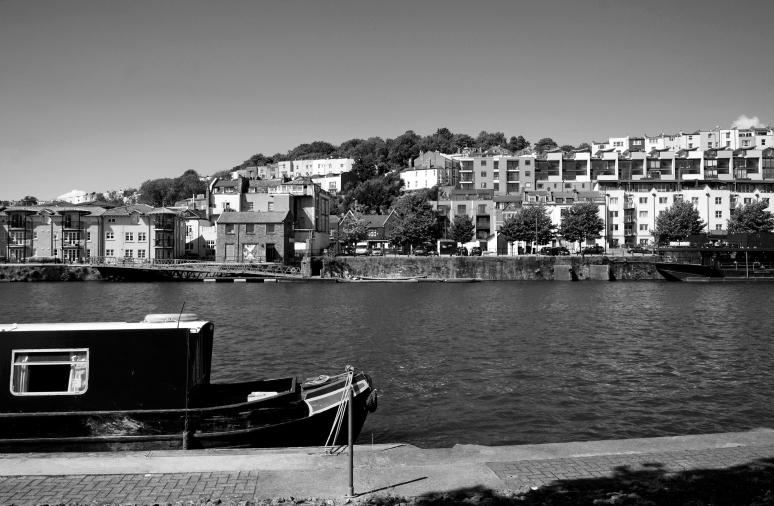
Bristol Harbourside. This image is available to licence through the EyeEm Market: https://www.eyeem.com/p/110544470
It’s really difficult to take a rubbish shot of the harbourside, although I did manage a few.
Baltic Warf was gorgeous in the sunshine and just the type of housing development that I could easily picture myself living in. Even The Matthew stopped my to give me a photo opportunity.
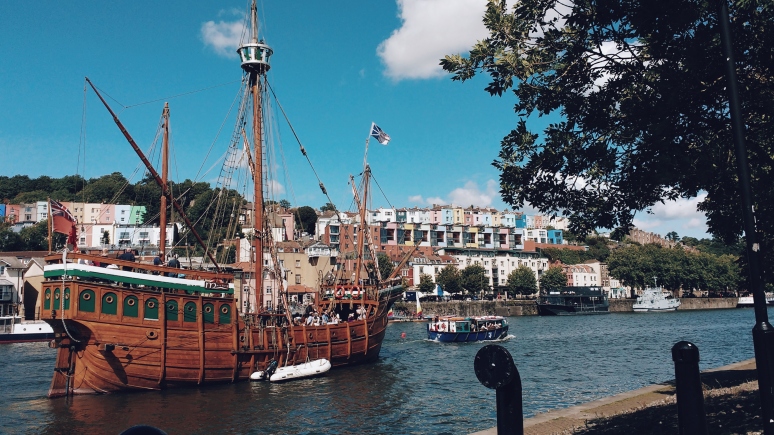
The Matthew. Phone image processed with VSCO Cam c4 preset.
I walked back up through the front of Baltic Warf, stopping to take anything that caught my eye. There was a lady in a gorgeous headscarf and robes and I wanted so bad to ask to take a picture, but my courage just isn’t there yet. I did consider just taking a picture, but I think that’s so rude and would hate for someone to do that to me. Comfortable in my moral choice, I felt a little disappointed in myself for not having the guts to ask.
Looking along the river. Image exclusive to mikesadventuresinpictures blog
Working my way along the Warf I couldn’t shake that feeling, and tried to distract myself somewhat by concentrating on an idea about the world in your hands…


I was aware of a man sat on a bench not far away looking out across the river and considered a shot. I ran through asking permission in my head, and tried to judge as best I could if it was a safe situation. I couldn’t tell (another meds side effect appears to be your instincts get turned way down low), so I went and took a few river images near-ish to him.

View from Baltic Warf. Image is available to licence via the EyeEm Market: https://www.eyeem.com/p/110519684
Layers of Bristol. Image available to licence via the EyeEm Market: https://www.eyeem.com/p/110505221
This image has been selected for the EyeEm Premium Collection and can be licenced via the EyeEm Market: https://www.eyeem.com/p/110591928
As I worked my way along, taking shots of the water, I heard him say in a none-to-quiet way “F**king cameras, f**cking clicking away..”
Ah sh*t. And with that I’m not able to compose my brain and that familiar heat returns in my skin and I feel the sweat run down my face. “Run away!” my brain is screaming at me! I moved away a bit and focused on a tree and steadied myself on the edge of a bench. The world is turned way up high and melting away all at once. Dammit!
Focus. Rationalise. Facts. Rationalise. Breathe. Repeat.
I’m ok. Breathe. Look around. Nothings changed, everything is how and where it was. Breathe.
I wanted to capture just what it felt like and could visualise it in my head as an image. I took a photo of the tree that I’d focused on. My tree of assistance.
Feeling pretty exhausted by this point I packed my camera away and took a walk back to the city centre to head home. Along the way, I tried to pull all the positives out of the few hours in the sunshine and by the time I got on the bus to the suburbs I was already feeling back on an even balance. All that work I had applied to a real world (well for the most part) situation and it had worked. That’s a pretty good feeling!
I could still feel the remnants of the anxiousness once I was home and still had that image of my anxious feeling etched in my head. Once I got in, I began working on an image of what it felt like. Here is it, what it feels like to spin out in a beautiful and public place.
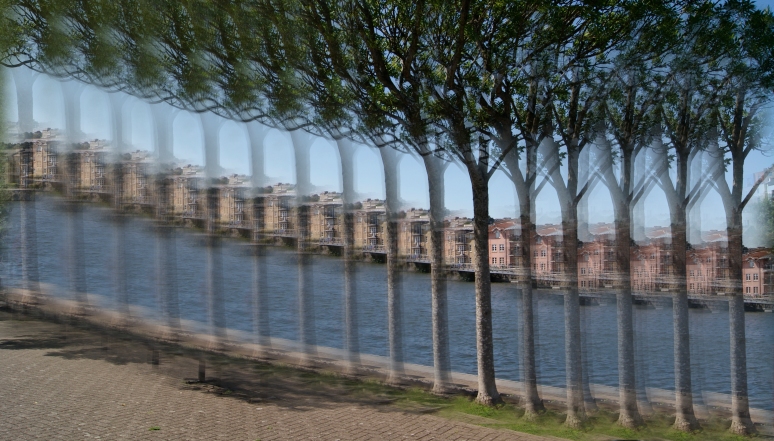
Anxiety in a Beautiful Place. Image exclusive to mikesadventuresinpictures
So anyway, I’m continuing to get better, stronger, remember more, trust myself and more than anything else feel like creating stuff! Thanks for taking the time to read my post and for sticking around. I really do appreciate it.
Until next time…

Captured on Spike Island, Bristol
Anxious
It’s been a very long while since I last wrote a blog piece for mikesadventuresinpictures. So first off, I’d like to apologise for my absence and offer you an explanation of what’s been going on.
I stopped feeling creative. I stopped being creative. Both on a personal and environmental level, I just wasn’t in a place conductive to feeling inspired or like I wanted to engage with my images. I’d moved into a new job and spent some time learning the role and then a combination of things happened and I sort of lost myself and my confidence.
It was dark.
I just took a while to notice the lack of light. But by the time I had, those feelings, issues, thoughts, they’d manifested into something else.
And that little bit of self-esteem (that fire in your soul) that keeps you going even when things get really bad, got extinguished.
It was so dark.
The environment then shifted again and actually got worse. I knew that there were really only two choices (because, well, you always have a choice). I chose to see my GP. I became diagnosed. I became medicated. I became a name on a waiting list (albeit a very short one- things were that bad) waiting to talk to someone. And then I talked to someone. Intensively for weeks. I learned new skills, found bits of myself that I’d thought were long dead, and killed some things that I’d been trying to keep alive. I kept working on it, it’s not easy, and to be honest it shouldn’t be. I went on a course for my self-esteem and again gained new skills and perhaps most importantly- some perspective. I started to recover, heal, what ever you want to call it.
And you know what? All the way along I could feel that need to be creative returning. It became and forms part of my recovery. It’s inextricably linked to my mental well-being. Not just my own sense of creativity either, other peoples creative endeavours and output too. Taking in an exhibition makes a huge difference in the sense that you can make a connection with piece or an artist or a collection, it can help inspire you, make you feel something and even the simple act of leaving the house will make you feel better most of the time (although that’s perhaps another post). And I’m lucky to live where I do. It’s a beautiful city and most weeks I have to choose between five or six different things that are on exhibition.
I also joined a stock photography website called Eyeem and have been building a gallery of images there that are available for editorial and/ or commercial licensing. If you have a minute, I’d really appreciate it if you’d take a look:
https://www.eyeem.com/u/michaelpoulton
It’s helped to give me some focus and to start to think about making photographs again. It’s a good feeling 🙂
So this marks a restart of mikesadventuresinpictures. It’s taken a long while to get back to this point and I’m not quite back to where I was but it’s happening bit by bit, and returning to my blog is another step in recovery going forward.
Again, apologies for my absence- thanks for sticking with me and a huge welcome if you’re new here… don’t forget to subscribe using the box to the right.
I’ll be back again soon 🙂
Shooting Spinning Sparks
As I mentioned in my previous post ‘Freezing Fireworks’ I made two other sets of photographs on that Saturday night. A set of firework bokeh images that will be my next post and a small set of catherine wheel images.
Shooting at night has many problems to solve to get shots that you are happy with, and under most circumstances it’s advisable to use a tripod or something to rest your camera on. This is so you can leave the shutter open to capture all the detail and available light without the camera moving and leaving those images blurry.
My shots from the previous post (Freezing Fireworks) were all taken with a tripod set up and after the boxed fireworks had all been let off, we moved onto the three catherine wheels in the set. I moved my camera and tripod over to near the fence where the catherine wheels were being nailed to. I suddenly realised that I wouldn’t be able to get a decent vantage point or even fit the tripod on the narrow piece of concrete path. I realised that I had no option really but to shoot hand held. Hand held with a slow shutter speed. I didn’t hold much hope for these really but I thought that it was worth a try.
I got down low and tried to steady myself as much as I could. The catherine wheel was lit and started to spin. I went to take a shot and remembered that the two second timer was still on. Here is what happens when you realise this and stupidly try to move the camera while the shutter is open…

Exp 0.6sec, f/8, ISO100. Focal length 55mm.
I turned the timer off, resumed the position and tried to get one more before it burned out:

Settings as above photograph.
While the next Catherine Wheel was nailed to the fence post I quickly reviewed the images I’d taken on my DSLR’s LCD screen and realised that I needed a better vantage point if I wanted the sort of photograph that I had in my head.
The next wheel was about to be lit so I steadied myself in front of the firework and watched as the view finder lit up in a tremendous pinky-red haze.

Settings as photograph 1.
I’m really pleased with how this one turned out, but I only got the one shot of it- it was a surprisingly short catherine wheel.
The final catherine wheel was nailed to the fence post and I knew that this was my last chance to get something good. I centered myself and made sure I was as steady as I could possibly be in the wind and rain and waited to see the spark of the fuse.
The catherine wheel span round and round getting faster and faster and I pressed the shutter.

Settings as previous photographs.
Please do not use these images without permission.
© Michael Poulton
I’m so pleased with the shot above. It’s essentially the exact shot that I had in my head and that’s such a good feeling. I’m thinking about having this one printed onto a wall canvas….
I’d love to try a few more catherine wheel shots, but I have a feeling that I may have to wait until next year. But at least I’ll be ready for them!
For my third and final firework blog post I’ll be showing you the bokeh photographs that I created from fireworks night, so keep a look out for that one.
Thanks for stopping by and if you liked what you saw, don’t forget to share it! 🙂
Other blog posts with night shots:
Freezing Fireworks
It’s become tradition in my family that on bonfire night we all get together at my Nan’s house with fireworks, sparklers and food to celebrate the evening together. This year, November 5th fell on a Tuesday and owing to everybody’s work commitments we weren’t able to do firework night on firework night. We’d arranged to hold it the weekend before but had to cancel it at the very last minute owing to the weather. We all rescheduled for the following weekend.
So on Saturday, we all arrived at my Nan’s just after it had got dark and started to drizzle with rain. I was a bit apprehensive as I had the camera with me to take some shots of the fireworks and I was worried that a: my camera was going to get wet and b: that there was a possibility that my camera (or me) could get hit by a firework. The thought of being able to get a couple of good shots soon put these fears mostly to rest though!
Before I’d left the house, I thought it might be a good idea to change a few of the settings on the camera to roughly what I thought I might need before the shoot. I adjusted the ISO, the shutter speed, the aperture, the white balance, the metering mode and set the timer for two seconds and turned the anti-shake system off in order to give me the best shot at sharp photographs. I also put the 18-55mm lens onto the camera as I felt that this lens gave me the most amount of flexibility without having to change lenses in the dark and rain.
Once I got to my Nan’s I grabbed an umbrella and headed out into the garden to set up the camera on the tripod and there I stood, in the rain with the umbrella over the camera waiting for the colours and explosions to begin.
The first few shots of the night were of course adjustment shots, to fine tune the camera settings further to what I wanted- which was ok really as it turned out the first two or three fireworks were more smoke than colours. Now that I had the settings about right, I began the photographs.

Exp 6sec, f/8, ISO100 focal length 18mm.

Exp 0.3sec, f/8, ISO100. Focal length 35mm
The main issues I came across while taking the firework pictures was using the two second timer meant that I didn’t get as much shooting time, but the trade off is a greater amount of sharper images and that the autofocus is useless in the dark! It could only lock-on once the firework was lit proper and then the two second timer delay kicked in. These two things together made things a bit frustrating but there really wasn’t a lot I could do to change it at the time.
I took some more photographs, adjusting the focal length and the shutter speed for slightly different results.

Exp 0.6sec, f/8, ISO100. Focal length 35mm.

Exp 1.3sec, f/8, ISO100. Focal length 35mm.
And all the while the rain was getting harder and harder. There was one advantage to shooting the fireworks in the rain though. The paving slabs in the garden became wet and started to reflect the lights and colours from the firework above.

Exp 2.5sec, f/8, ISO100. Focal length 40mm.

Exp 2.5sec, f/8, ISO100. Focal length 40mm.

Exp 2sec, f/8, ISO100. Focal length 35mm.
Since shooting these photographs, I have realised that the easiest way to get around using the two second timer would be to invest in a cable shutter release so that I don’t have to touch the camera at all to take a photograph. In the situation with the fireworks, this would have probably allowed me an extra one or two photographs per firework, which doesn’t sound like a lot of extra shots, but it makes a difference when the firework is only firing for 10 or 20 seconds. I think it would also be particularly useful for shooting night shots of the city too and perhaps even during portrait sittings with children as it means I wouldn’t be hid behind the camera and it would mean I could spend more time interacting with my subjects and helping to get the best from them.
And with that, our firework night came to a close.

Exp 3.2sec, f/8, ISO100. Focal length 40mm.

Exp 0.3sec, f/8, ISO100. Focal length 35mm.

Exp 2sec, f/8, ISO100. Focal length 35mm.
As well as making these photographs of the boxed fireworks, I also made a set of Catherine Wheel images, that I actually shot handheld and that I’m really pleased with, and a series of photographs where the fireworks are just represented as bokeh. (Some of my longer term readers may remember the photographs from ‘I Lost my Focus for Bokeh‘) where I made some photographs featuring those lush colourful bokeh circles using a fibre optic lamp, and a 50mm lens on manual focus. Both of these sets will be featured on adventuresinpictures in the coming days, so remember to check back for those.
You can also find this firework set on Flickr, where you can view a full-screen slideshow of the photographs featured in this blog post at the link here.
Of course, the easiest way to keep up with the goings on of the adventuresinpictures blog is to subscribe for free by entering your email address in the box at the top right of this post. That way, my new posts will arrive straight to your inbox for when you have five minutes spare to read it.
Thanks for stopping by 🙂
Flickr Photos


